


Key Takeaways:
- Understanding the Rock Tumbling Process: Learn the step-by-step process of using a rock tumbler to transform rough rocks into perfectly polished stones.
- Choosing the Right Materials: Discover the importance of selecting rocks of similar hardness and the correct type of grit for each stage.
- Safety and Maintenance Tips: Get practical advice on maintaining your rock tumbler and ensuring safety throughout the tumbling process.
Introduction
Rock tumbling is a fascinating hobby that allows you to transform rough rocks into beautiful, polished stones. Whether you're a beginner or an experienced rockhound, understanding how to use a rock tumbler effectively for tumbling rocks is crucial for achieving the best results. This guide will walk you through the entire rock tumbling process, from selecting the right rocks to the final polishing stage.
1. Getting Started with Rock Tumbling
Rock tumbling is a natural process that mimics the action of ocean waves and river currents, which smooth and polish rocks over time. By using a rock tumbler, you can speed up this process and achieve stunning results in a matter of weeks.
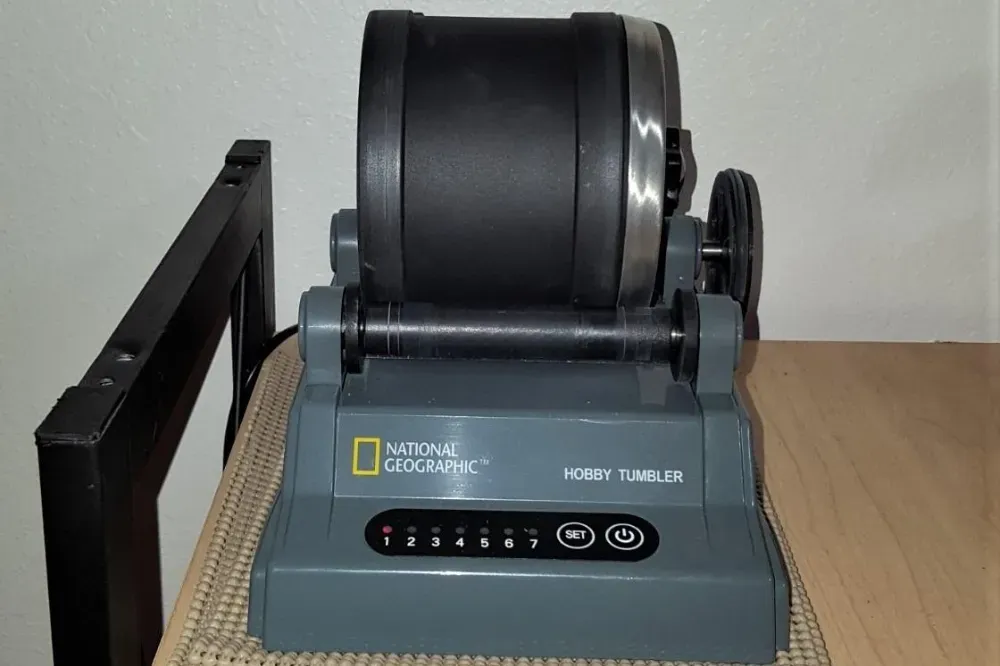
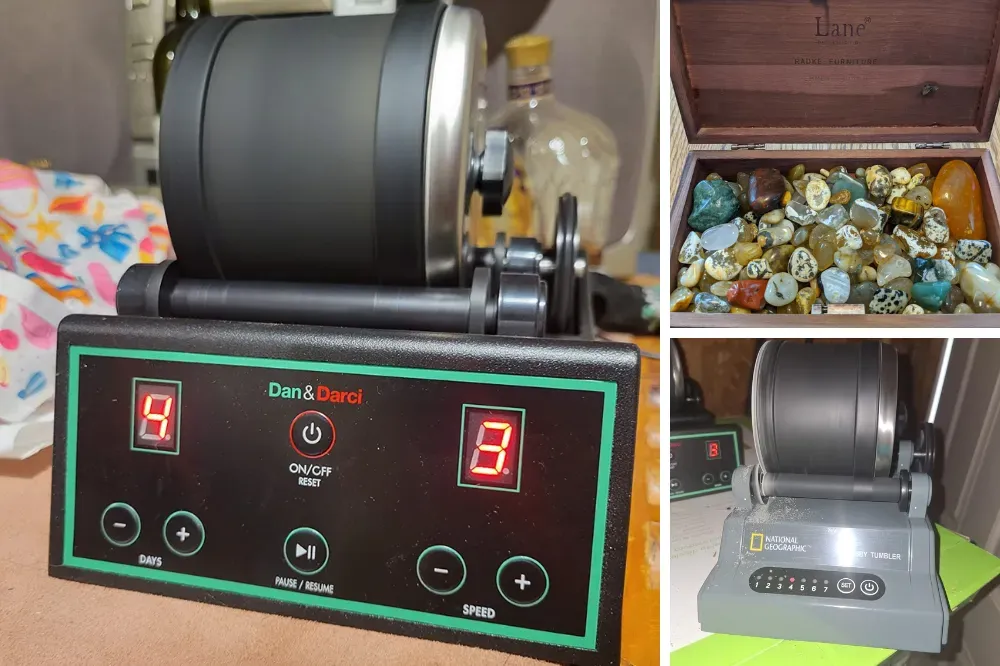
To get started, you'll need a rock tumbler, which can be either a rotary rock tumbler or a vibratory tumbler. Rotary tumblers are more common and are ideal for beginners. They work by rotating a barrel filled with rocks, water, and abrasive grit, which gradually smooths and polishes the rocks. This process allows you to tumble rocks effectively, ensuring they become smooth and shiny.
2. Choosing the Right Rocks
Selecting the right rocks is crucial for successful rock tumbling. It's important to choose rocks that are about the same hardness to ensure even polishing. The Mohs hardness scale is a useful tool for determining the hardness of different types of rocks. For example, quartz has a hardness of 7, while calcite has a hardness of 3. Soft rocks should be avoided because they can wear away quickly.
When selecting rocks, avoid those with sharp edges or fractures, as they can break during the tumbling process. It's also a good idea to choose rocks of various sizes to ensure a balanced load in the tumbler barrel. Softer rocks will wear down faster when tumbled with harder rocks, leading to scratches and improper shaping and smoothing of the harder rocks.
3. Preparing the Rocks
Before placing the rocks in the tumbler, it's essential to clean them thoroughly. Use an old toothbrush and warm water to remove any dirt or debris. This step is important to prevent contamination of the grit and ensure a smooth tumbling process.
Once the rocks are clean, inspect them for any broken pieces or rough edges. Remove any rocks that are too soft or have significant fractures, as they can break and damage other rocks during tumbling. This is crucial for the successful polishing of rocks.
4. Filling the Tumbler Barrel
To fill the barrel, start by adding enough rocks to fill it about two-thirds full. This allows for proper tumbling action and prevents the rocks from grinding against each other too harshly. Next, add water to the barrel, filling it just below the level of the rocks.
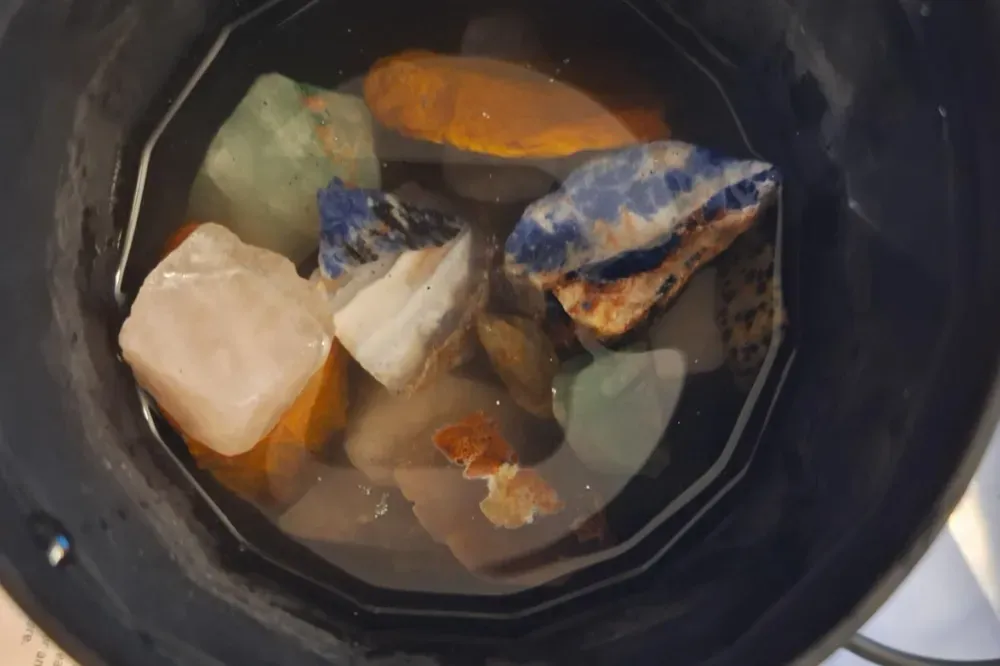
It's important to leave some space in the barrel for the rocks to move and tumble. Adding too many rocks or too much water can hinder the tumbling process and result in uneven polishing.
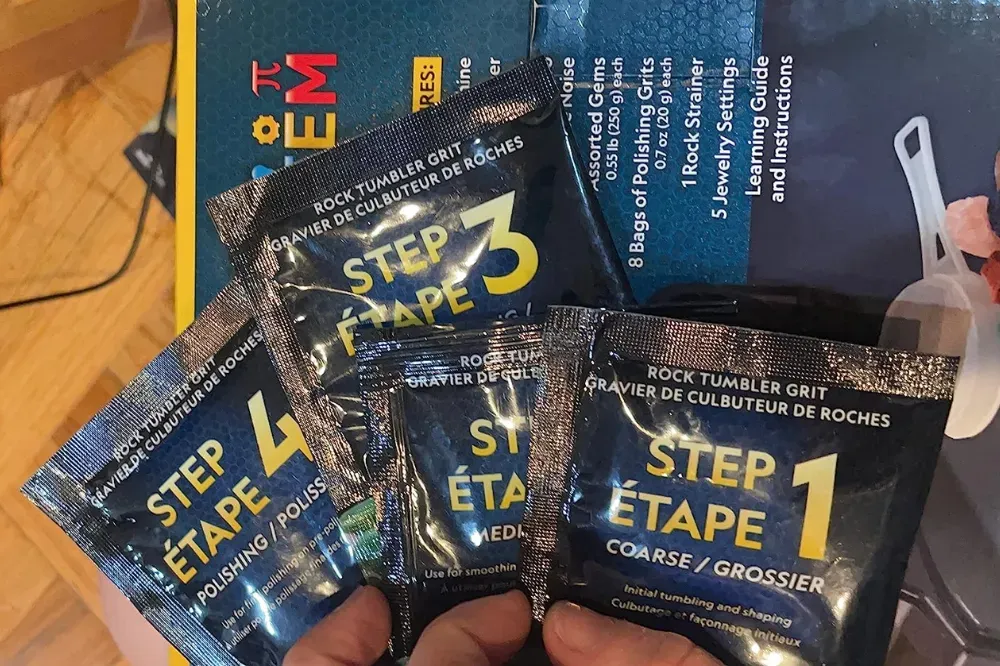
5. Adding the Coarse Grit
The first step in the rock tumbling process is the coarse grind stage. This stage involves using coarse grit, typically silicon carbide, to remove rough edges and shape the rocks. Add a tablespoon of grit for every pound of rock in the barrel.
Seal the barrel tightly and place it on the tumbler machine. Let the tumbler run for about a week, checking periodically to ensure everything is running smoothly. The coarse grind stage is the most important step, as it sets the foundation for the subsequent stages.
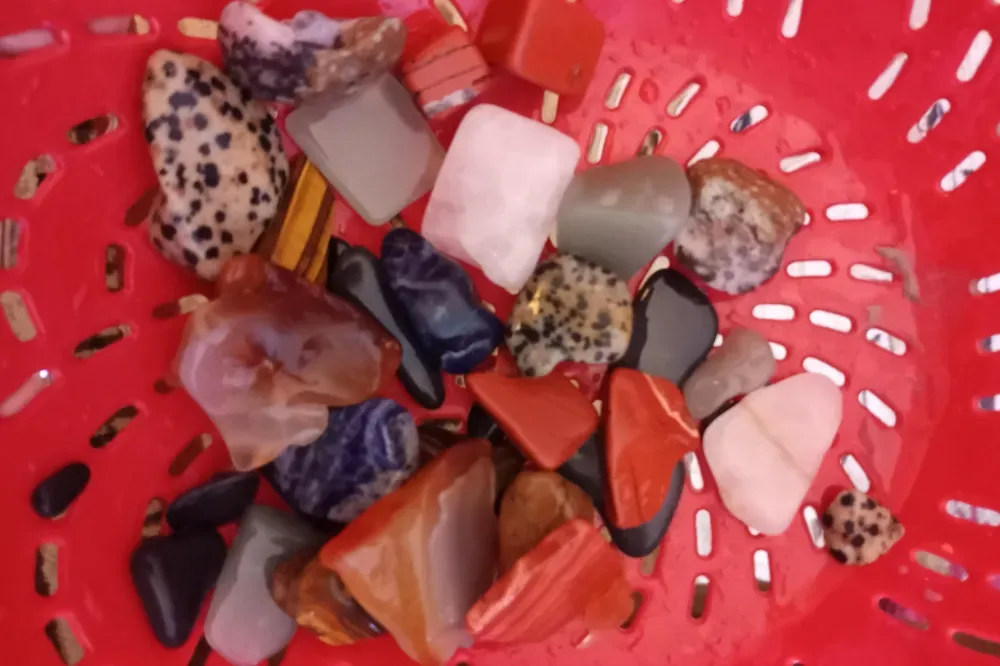
6. Cleaning the Rocks and Barrel
After the coarse grind stage, it's time to clean the rocks and the barrel. Open the barrel and carefully pour out the contents into a colander. Rinse the rocks thoroughly with warm water to remove any remaining grit.
Clean the barrel and lid with warm, soapy water, ensuring there is no grit left behind. This step is crucial to prevent contamination of the next stage and ensure a smooth tumbling process.
7. The Medium Grit Stage
The next step is the medium grit stage, which further smooths the rocks and prepares them for polishing. Add the cleaned rocks back into the barrel, along with fresh water and medium grit. Use the same amount of grit as in the coarse grind stage.
Seal the barrel and place it back on the tumbler machine. Let it run for another week, checking periodically to ensure everything is running smoothly. The medium grit stage helps to refine the shape of the rocks and remove any remaining rough edges.
8. Cleaning and Inspecting the Rocks
After the medium grit stage, it's time to clean and inspect the rocks again. Rinse the rocks thoroughly with warm water and inspect them for any remaining rough edges or imperfections. Remove any rocks that are not shaping up well or have significant fractures.
Clean the barrel and lid thoroughly to remove any remaining grit. This step is crucial to prevent contamination of the next stage and ensure a smooth tumbling process. Thorough cleaning is essential to achieve perfectly polished rocks.
9. The Fine Grit Stage
The fine-grit stage is where the rocks start to take on a smooth, polished appearance. Add the cleaned rocks back into the barrel, along with fresh water and fine grit. Use the same amount of grit as in the previous stages.
Seal the barrel and place it back on the tumbler machine. Let it run for another week, checking periodically to ensure everything is running smoothly. The fine grit stage helps to smooth out any remaining imperfections and prepare the rocks for the final polish.
10. Cleaning and Preparing for Polishing
After the fine-grit stage, it's time to clean and prepare the rocks for the final polish. Rinse the rocks thoroughly with warm water and inspect them for any remaining imperfections. Remove any rocks that are not shaping up well or have significant fractures.
Clean the barrel and lid thoroughly to remove any remaining grit. This step is crucial to prevent contamination of the final polish and ensure a smooth tumbling process.
11. The Polishing Stage
The polishing stage is where the rocks achieve their final, glossy appearance. Add the cleaned rocks back into the barrel, along with fresh water and a polishing compound, such as aluminum oxide or cerium oxide. Use the same amount of polishing compound as in the previous stages.
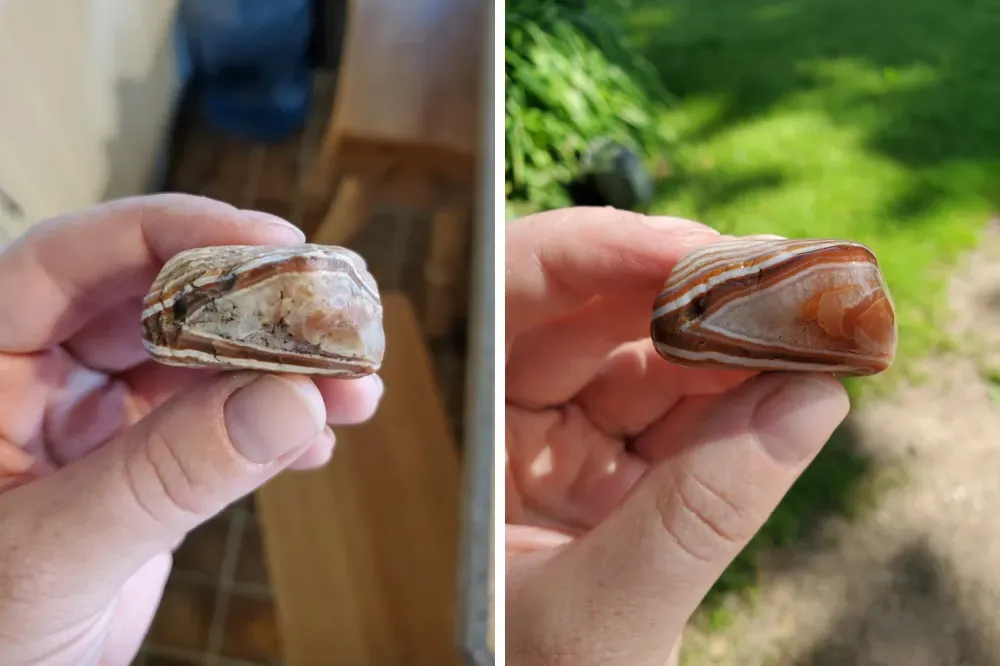
Seal the barrel and place it back on the tumbler machine. Let it run for another week, checking periodically to ensure everything is running smoothly. The polishing stage helps to achieve a high-gloss finish and bring out the natural beauty of the rocks.
12. Cleaning and Inspecting the Final Product
After the polishing stage, it's time to clean and inspect the final product. Rinse the rocks thoroughly with warm water and inspect them for any remaining imperfections. Remove any rocks that are not shaping up well or have significant fractures.
Clean the barrel and lid thoroughly to remove any remaining polishing compound. This step is crucial to prevent contamination of future batches and ensure a smooth tumbling process.
13. Using Ceramic Media and Plastic Pellets
To achieve the best results, consider using ceramic media or plastic pellets during the tumbling process. These materials help to cushion the rocks and prevent them from grinding against each other too harshly.
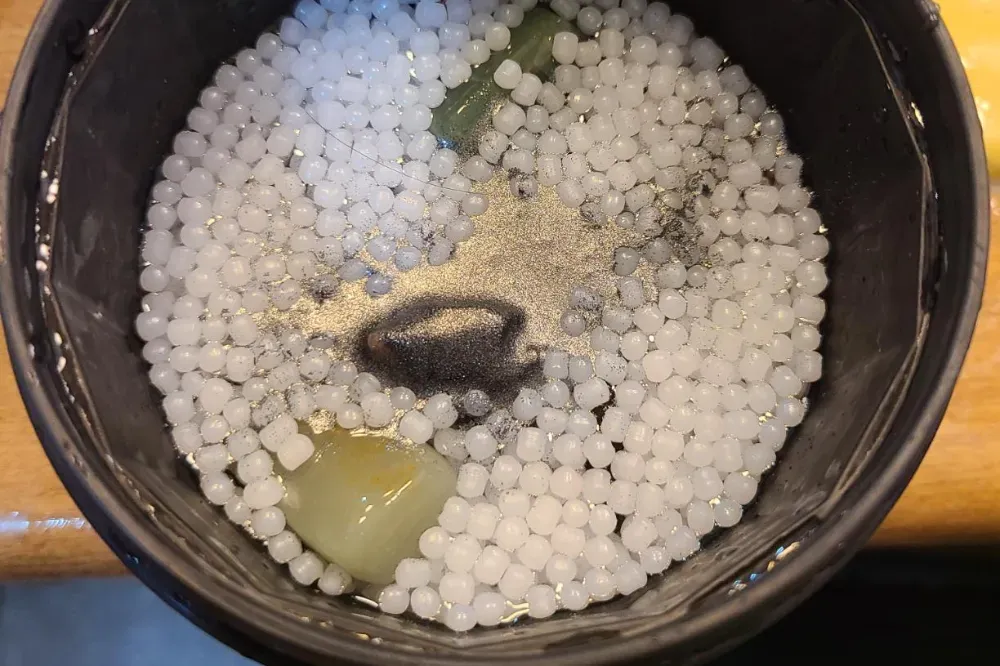
Ceramic media is especially useful for the polishing stage, as it helps to achieve a high-gloss finish. Plastic pellets can be used in the coarse and medium grit stages to help fill the barrel and ensure proper tumbling action.
14. Troubleshooting Common Issues
Rock tumbling can sometimes present challenges, but with a little troubleshooting, you can overcome them. If your rocks are not polishing evenly, it may be due to contamination of the grit or polishing compound. Ensure that the barrel and rocks are thoroughly cleaned between each stage.
If your rocks are breaking or chipping during the tumbling process, it may be due to using rocks of different hardness or adding too many rocks to the barrel. Ensure that you are using rocks of similar hardness and that the barrel is not overfilled.
15. Safety Tips for Rock Tumbling
Safety is paramount when using a rock tumbler. Always wear safety glasses to protect your eyes from flying debris and dust. Use gloves when handling rocks and grit to prevent cuts and abrasions.
Before starting the machine, ensure that the tumbler is placed on a stable surface and that the barrel is securely sealed. Then, follow the manufacturer's instructions and guidelines for safe operation and maintenance of the tumbler.
Summary
Rock tumbling is a rewarding hobby that allows you to transform rough rocks into beautiful, polished stones. By following the steps outlined in this guide, you can achieve stunning results and enjoy the process of creating your own polished stones. Remember to choose rocks of similar hardness, clean the barrel and rocks thoroughly between each stage, and use the appropriate grit and polishing compound for each step. Each stage in polishing rocks is crucial for achieving smooth, shiny, and round stones.
FAQ
Q1: How long does the rock tumbling process take?
The rock tumbling process typically takes about four to six weeks, depending on the type of rocks and the desired level of polish. Each stage (coarse grit, medium grit, fine grit, and polishing) usually takes about one week.
Q2: Can I use any type of rock for tumbling?
Not all rocks are suitable for tumbling. It's important to choose rocks of similar hardness to ensure even polishing. Avoid rocks with sharp edges or fractures, as they can break during the tumbling process.
Q3: How do I know when to move to the next stage?
You can move to the next stage when the rocks have achieved the desired level of smoothness and shape. Inspect the rocks after each stage and remove any that are not shaping up well or have significant fractures. Clean the barrel and rocks thoroughly before moving to the next stage to prevent contamination.
 Jose Ribeiro
 Jose Ribeiro